
How to Add an MX Record in cPanel (2026 Beginner’s Guide)
Introduction
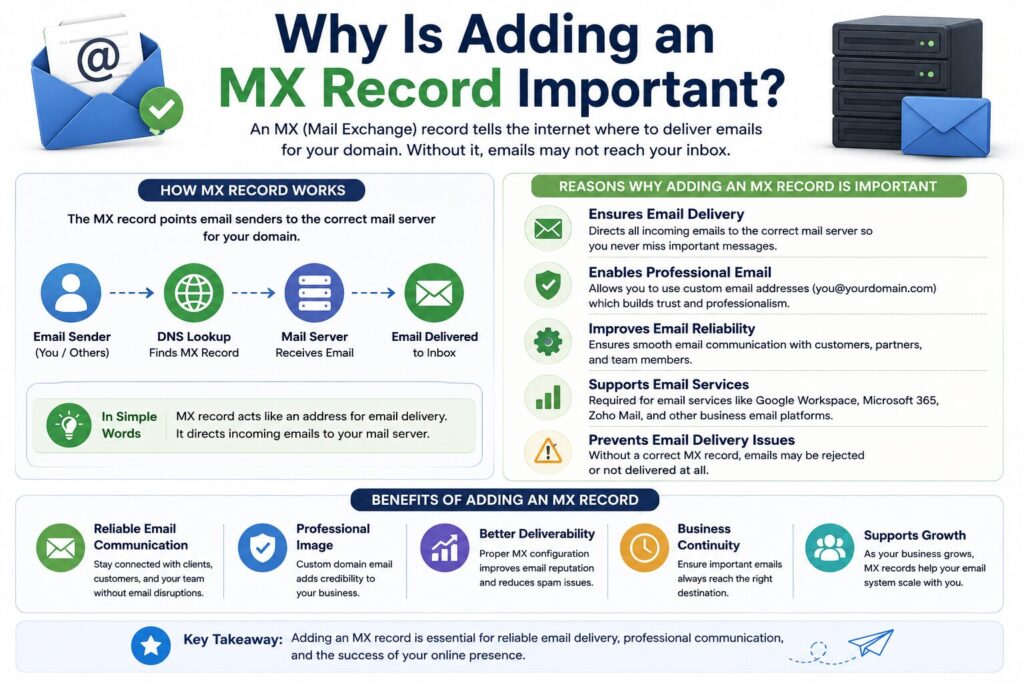
If you want your domain email (such as [email protected]) to work properly, you may need to add an MX Record in cPanel using DNS Zone Editor. An MX (Mail Exchange) Record tells the internet which mail server should receive emails for your domain.
Whether you’re connecting your domain to Google Workspace, Microsoft 365, Zoho Mail, or another email provider, adding the correct MX Record is an important step.
In this guide, you’ll learn exactly how to add an MX Record in cPanel, what each setting means, common mistakes to avoid, and tips to ensure your email works correctly.

What Is an MX Record?
An MX Record (Mail Exchange Record) is a DNS record that tells the internet where incoming emails for your domain should be delivered.
For example:
If someone sends an email to:
The MX Record tells the sender’s email server which mail server should receive that message.
Simple Example
Imagine your website is your house.
Your domain name is your address.
The MX Record is the postal instruction telling the mail carrier which mailbox to deliver your letters to.
Without a correct MX Record, emails may never reach your inbox.
Why Is Adding an MX Record Important?
Adding the correct MX Record helps you:
- Receive emails on your domain
- Connect third-party email services
- Improve email reliability
- Avoid lost emails
- Configure professional business email addresses
Common situations include:
- Setting up Google Workspace
- Using Microsoft 365
- Configuring Zoho Mail
- Moving to a new email provider
- Migrating hosting accounts
Step-by-Step Guide to Add an MX Record in cPanel
Step 1: Log in to cPanel
What to do
Sign in to your cPanel account using your username and password.
Why?
All DNS management tools are located inside cPanel.
What you’ll see
The cPanel dashboard.
Beginner Tip
Use HTTPS when accessing cPanel for better security.
Common Mistake
Logging into the wrong hosting account.
Step 2: Open DNS Zone Editor
What to do
Scroll to the Domains section.
Click Zone Editor.
Why?
Zone Editor lets you manage DNS records such as:
- A Record
- MX Record
- CNAME
- TXT Record
What you’ll see
A list of your domains with management options.
Beginner Tip
Choose the correct domain if you host multiple websites.
Common Mistake
Editing the wrong domain.
Step 3: Manage the Domain
What to do
Find your domain.
Click Manage.
Why?
This opens all existing DNS records.
What you’ll see
A complete DNS record list.
Beginner Tip
Review the existing MX records before adding a new one.
Common Mistake
Deleting important DNS records accidentally.
Step 4: Add a New MX Record
What to do
Click Add Record or + Add Record.
Choose MX as the record type.
Fill in the required fields.
| Field | Example |
|---|---|
| Name | yourdomain.com |
| Priority | 10 |
| Destination | mail.yourprovider.com |
Why?
These values tell email systems where to deliver incoming mail.
What you’ll see
A form requesting MX Record details.
Beginner Tip
Always copy the values exactly as provided by your email provider.
Common Mistake
Entering the wrong mail server hostname.
Step 5: Save the Record
What to do
Click Save Record.
Why?
This updates your DNS settings.
What you’ll see
The new MX Record listed in Zone Editor.
Beginner Tip
DNS changes usually take some time to update worldwide.
Common Mistake
Expecting email to work immediately.
DNS propagation can take anywhere from a few minutes up to 24–48 hours.
Understanding MX Record Priority
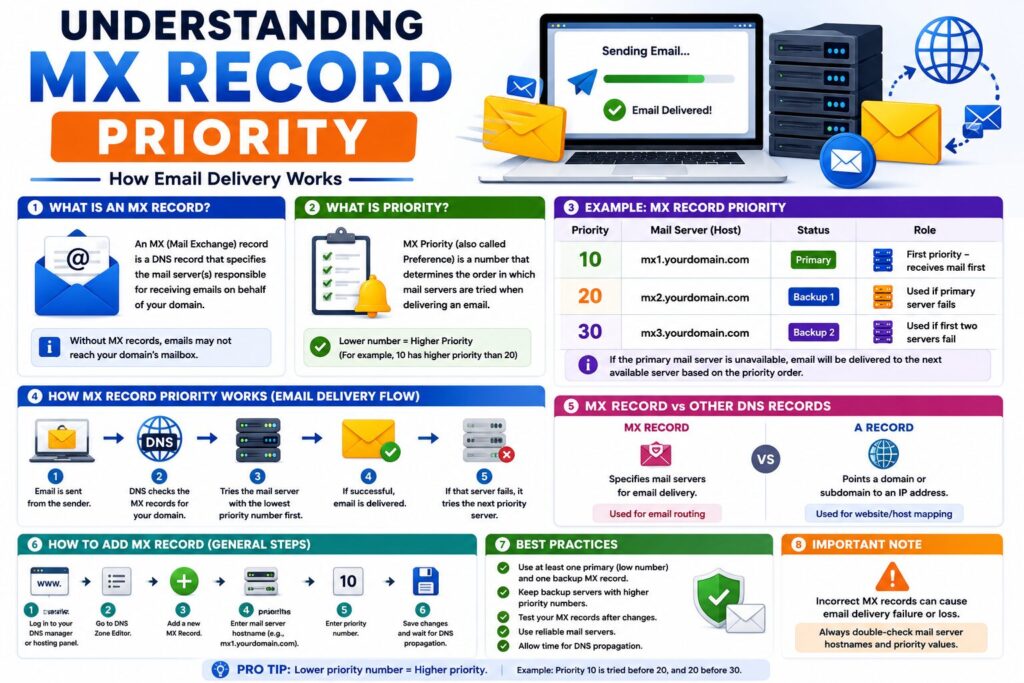
Some email providers use multiple MX Records.
The Priority number tells email servers which mail server should be used first.
Example:
| Priority | Mail Server |
|---|---|
| 10 | mail1.example.com |
| 20 | mail2.example.com |
Lower numbers have higher priority.
Best Practices
- Always verify MX values with your email provider.
- Keep a backup of current DNS records.
- Remove outdated MX Records if instructed.
- Wait for DNS propagation before testing.
- Double-check spelling of mail server names.
- Use lower priority numbers correctly.
- Test email after making changes.
Common Problems and Solutions
| Problem | Solution |
|---|---|
| Email not arriving | Check MX values for errors. |
| Wrong mail server | Update Destination hostname. |
| DNS changes not working | Wait for DNS propagation. |
| Multiple conflicting MX records | Remove incorrect entries if recommended. |
| Email still goes to old provider | Clear old DNS records or wait longer. |
| Invalid priority | Use the priority values provided by your email service. |
Frequently Asked Questions
1. What is an MX Record?
It tells the internet where emails for your domain should be delivered.
2. Can I have multiple MX Records?
Yes.
Many email providers use multiple mail servers for backup and reliability.
3. How long do MX Record changes take?
Usually between a few minutes and 24–48 hours.
4. Will changing an MX Record affect my website?
No.
MX Records only affect email services.
5. Can I undo an MX Record change?
Yes.
You can edit or restore the previous DNS settings.
6. Do I need to remove old MX Records?
Only if your new email provider instructs you to do so.
7. What happens if the MX Record is wrong?
Emails may bounce or never reach your mailbox.
8. How do I know the correct MX values?
Your email provider will give you the required MX Records during setup.
Conclusion
Knowing how to add an MX Record in cPanel using DNS Zone Editor is an essential skill when setting up professional email for your domain. By following the steps in this guide, you can configure your email service correctly and avoid common delivery issues.
Always double-check the MX values provided by your email provider, keep a backup of your DNS records, and allow time for DNS propagation after saving your changes. With the correct configuration, your domain email will be ready to receive messages reliably.
