
How to Edit .htaccess File Through cPanel File Manager (2026 Beginner’s Guide)
Introduction
Edit .htaccess File in cPanel File Manager to control website redirects, improve security, enable caching, and customize your website’s server settings. Learning how to edit .htaccess file safely helps you manage important Apache configuration rules without using SSH. In this 2026 beginner’s guide, you’ll learn the complete process step by step.

What Is the .htaccess File?
The .htaccess (Hypertext Access) file is a hidden configuration file used by Apache web servers. It tells your web server how to handle certain requests without changing the main server settings.
Think of it as a rule book for your website.
For example, you can use the .htaccess file to:
- Redirect one page to another
- Force visitors to use HTTPS
- Protect folders with passwords
- Block unwanted visitors
- Create custom error pages
- Improve website security
- Enable website caching
Simple Example
Imagine your website has moved from:
example.com/blogto
example.com/articlesInstead of showing visitors a broken page, you can add a redirect inside the .htaccess file so everyone automatically goes to the new location.
Why Is Editing the .htaccess File Important?
The .htaccess file gives website owners control over many important website settings.
Benefits include:
- Improve website security
- Redirect old URLs
- Enable HTTPS
- Improve SEO
- Block malicious traffic
- Customize error pages
- Protect sensitive directories
- Improve loading speed with caching
- Control website access
Many WordPress plugins also automatically update the .htaccess file to enable features like pretty permalinks.
Requirements Before You Start
Before editing the .htaccess file, make sure you have the following:
| Requirement | Why It’s Needed |
|---|---|
| Hosting account | Access to your website files |
| cPanel login | To open File Manager |
| Website backup | To restore if something goes wrong |
| Modern web browser | Chrome, Firefox, Edge, or Safari |
| Enough storage | For backup copies |
Important: Always create a backup of your
.htaccessfile before making any changes. A small mistake can make your website inaccessible.
Step-by-Step Guide to Edit .htaccess File Through cPanel File Manager
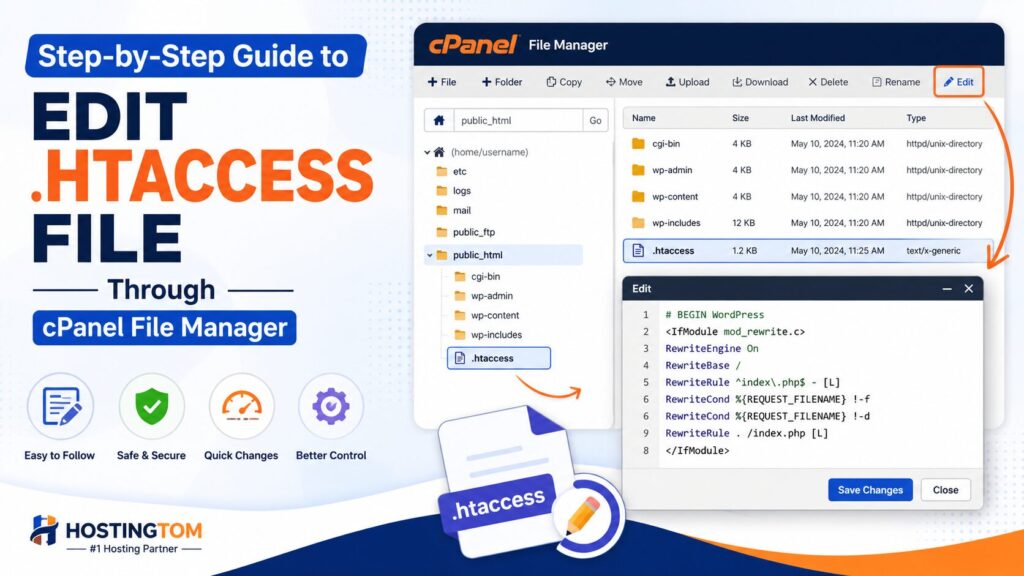
Step 1: Log in to Your cPanel Account
What to Do
Visit your hosting provider’s cPanel login page.
Enter your:
- Username
- Password
Click Log In.
Why You’re Doing This
You need access to File Manager to edit website files.
What You’ll See
The cPanel dashboard with many tools.
Beginner Tip
Use HTTPS while logging into cPanel for better security.
Common Mistake
Using the wrong login credentials.
Step 2: Open File Manager
Inside cPanel:
- Scroll to Files
- Click File Manager
Why You’re Doing This
File Manager lets you manage website files without FTP software.
What You’ll See
A folder list on the left and files on the right.
Beginner Tip
Don’t delete files unless you’re sure what they do.
Common Mistake
Opening the wrong website folder.
Step 3: Open Your Website’s Root Directory
Most websites are stored inside:
public_htmlIf you have multiple domains, choose the correct domain folder.
Why You’re Doing This
The .htaccess file is usually stored in your website’s root directory.
What You’ll See
Files like:
- index.php
- wp-config.php
- wp-content
- .htaccess
Beginner Tip
If you don’t see .htaccess, it may be hidden.
Step 4: Show Hidden Files
Since .htaccess starts with a dot (.), it’s hidden by default.
To display hidden files:
- Click Settings in File Manager.
- Check Show Hidden Files (dotfiles).
- Click Save.
Why You’re Doing This
Otherwise, the .htaccess file won’t appear.
What You’ll See
Hidden files become visible.
Beginner Tip
Many important configuration files are hidden.
Common Mistake
Thinking the file doesn’t exist.
Step 5: Create a Backup
Before editing:
- Right-click
.htaccess - Click Copy
- Rename it to something like:
.htaccess-backupWhy You’re Doing This
If something goes wrong, you can quickly restore the original version.
What You’ll See
A duplicate backup file.
Beginner Tip
Never skip this step.
Common Mistake
Editing the only copy.
Step 6: Edit the .htaccess File
Right-click the file.
Choose:
Edit
or
Code Edit
Click Edit to continue.
Why You’re Doing This
This opens the file inside the browser.
What You’ll See
A text editor with configuration rules.
Beginner Tip
Read the existing code before making changes.
Common Mistake
Deleting existing rules accidentally.
Step 7: Make Your Changes
Now add or modify the required code.
For example, to redirect visitors:
Redirect 301 /old-page https://example.com/new-pageTo force HTTPS:
RewriteEngine On
RewriteCond %{HTTPS} !=on
RewriteRule ^ https://%{HTTP_HOST}%{REQUEST_URI} [L,R=301]
Why You’re Doing This
These rules change how your website behaves.
What You’ll See
The updated configuration.
Beginner Tip
Only copy code from trusted sources.
Common Mistake
Adding code in the wrong location.
Step 8: Save the File
Click:
Save Changes
Wait until the editor confirms the file has been saved.
Why You’re Doing This
Without saving, your changes won’t take effect.
What You’ll See
A success message.
Beginner Tip
Refresh your website after saving.
Common Mistake
Closing the editor before saving.
Step 9: Test Your Website
Open your website in a new browser tab.
Check:
- Homepage
- Contact page
- Login page
- HTTPS
- Redirects
Why You’re Doing This
To make sure your changes work correctly.
What You’ll See
Your website should load normally.
Beginner Tip
Clear your browser cache if changes don’t appear immediately.
Common Mistake
Ignoring error messages.
Common Uses of the .htaccess File
The .htaccess file can perform many useful tasks.
| Feature | Purpose |
| URL Redirects | Send visitors to another page |
| Force HTTPS | Secure website connections |
| Password Protection | Protect directories |
| Custom Error Pages | Display friendly 404 pages |
| Block IP Addresses | Improve security |
| Enable Compression | Faster website loading |
| Browser Caching | Improve performance |
| Rewrite URLs | SEO-friendly links |
Best Practices
Follow these best practices whenever editing the .htaccess file:
- Always create a backup first.
- Make one change at a time.
- Test your website after each change.
- Keep a copy of the original file.
- Use trusted code examples.
- Avoid deleting existing rules unless necessary.
- Keep comments explaining your changes.
- Remove unnecessary rules.
- Protect the file from unauthorized access.
- Update your website regularly.
Common Problems and Solutions
| Problem | Solution |
| Website shows 500 Internal Server Error | Restore your backup and check for syntax errors. |
| .htaccess file missing | Enable “Show Hidden Files.” |
| Website redirects incorrectly | Review redirect rules carefully. |
| HTTPS not working | Verify your SSL certificate is installed. |
| Changes don’t appear | Clear browser and website cache. |
| File won’t save | Check file permissions or available disk space. |
| Website becomes inaccessible | Replace the edited file with your backup. |
Security Tips
Editing the .htaccess file can improve security when done correctly.
Remember to:
- Use strong cPanel passwords.
- Enable two-factor authentication if available.
- Keep regular website backups.
- Remove unused redirects.
- Review changes before saving.
- Limit access to your hosting account.
- Avoid copying code from unknown websites.
Beginner Checklist
Before editing:
- ✅ Logged into cPanel
- ✅ Opened File Manager
- ✅ Enabled hidden files
- ✅ Found
.htaccess - ✅ Created a backup
- ✅ Reviewed existing code
After editing:
- ✅ Saved changes
- ✅ Tested website
- ✅ Checked redirects
- ✅ Verified HTTPS
- ✅ Cleared browser cache
Frequently Asked Questions (FAQs)
1. What is the .htaccess file?
It is a hidden configuration file that controls how an Apache web server handles requests for your website.
2. Is it safe to edit the .htaccess file?
Yes, as long as you create a backup first and make careful changes.
3. Why can’t I find the .htaccess file?
It’s usually hidden. Enable Show Hidden Files (dotfiles) in File Manager settings.
4. Can editing .htaccess break my website?
Yes. Even a small mistake can cause errors, which is why creating a backup is essential.
5. Do WordPress websites use the .htaccess file?
Yes. WordPress uses it for permalink settings and other features.
6. How do I restore my original .htaccess file?
Delete the edited version and rename your backup file back to .htaccess.
7. Can I edit the file without cPanel?
Yes. You can use FTP software or SSH access if your hosting provider supports them.
8. Does every hosting server use .htaccess?
No. It mainly works with Apache servers. Nginx servers use different configuration files.
9. Should I edit the file often?
Only when necessary. Avoid unnecessary changes.
10. Can I improve SEO using the .htaccess file?
Yes. You can create redirects, force HTTPS, and improve URL structure, all of which can help SEO when implemented correctly.
Conclusion
Knowing how to edit the .htaccess file through cPanel File Manager is a valuable skill for any website owner. Whether you want to redirect pages, improve security, enable HTTPS, or optimize your site’s performance, the .htaccess file gives you powerful control over your website.
Always remember to create a backup before making changes, edit the file carefully, and test your website after every update. By following the steps and best practices in this guide, even beginners can safely manage their .htaccess file with confidence.
With a little practice, you’ll be able to handle common website configurations without needing advanced technical knowledge.
