
How to Import Database via phpMyAdmin in cPanel (2026 Guide)
How to Import Database via phpMyAdmin in cPanel (2026 Beginner’s Guide)
Introduction
If you’re moving a website, restoring a backup, or setting up WordPress, you’ll likely need to import a database via phpMyAdmin in cPanel. Don’t worry if you’ve never done it before—it only takes a few minutes.
A database stores important website information like posts, pages, user accounts, settings, and product details. Importing a database means uploading a backup file into your hosting account so your website can use that data again.
In this guide, you’ll learn exactly how to import a database using phpMyAdmin in cPanel, what you need before you begin, common mistakes to avoid, and helpful troubleshooting tips.

What Is Database Import via phpMyAdmin?
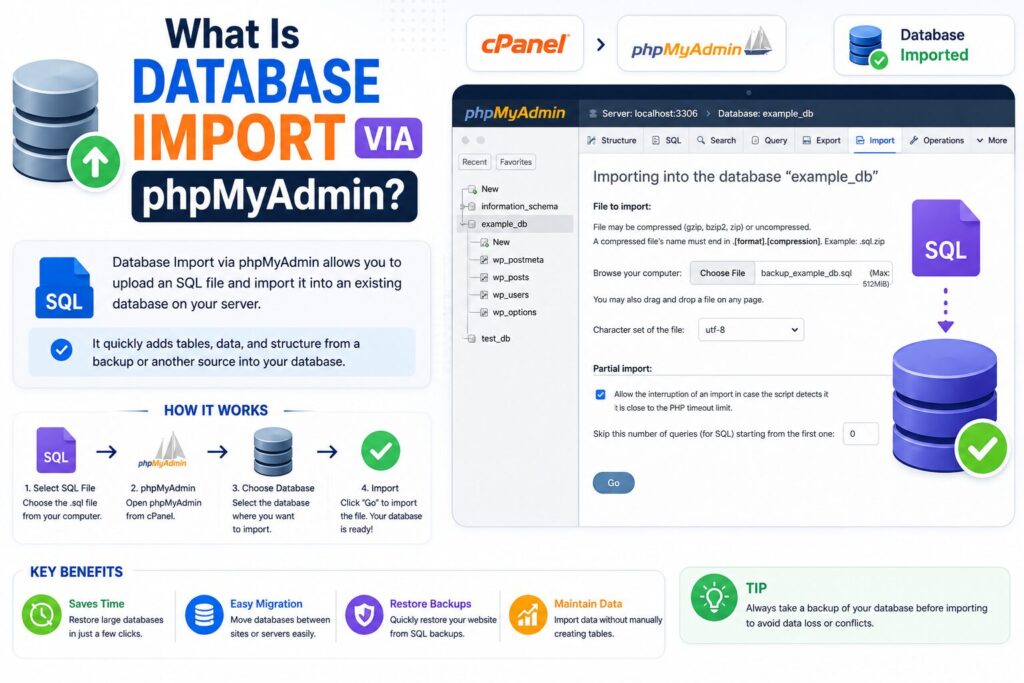
Database import is the process of uploading a SQL database backup into your hosting account using phpMyAdmin, a web-based tool included with cPanel.
Think of a database like a notebook that stores all your website’s information.
For example:
- You move your WordPress website to a new hosting account.
- You upload your website files.
- Now you import the SQL database.
- Your website becomes complete because all its content and settings are restored.
Without importing the database, many websites will not work properly.
Why Is It Important?
Importing a database is useful in many situations.
Benefits
- Restore a website backup
- Migrate a website to another host
- Install a website manually
- Recover lost website data
- Import a database received from a developer
- Restore WordPress after reinstalling
Common users include:
- Bloggers
- Small businesses
- Developers
- Website owners
- WordPress users
Requirements Before You Start
Make sure you have the following:
| Requirement | Why You Need It |
|---|---|
| Hosting account | To access cPanel |
| cPanel login | Required to open phpMyAdmin |
| Existing database | Database must already exist |
| Database user assigned | User should have all privileges |
| SQL backup (.sql or .sql.gz) | The database file to import |
| Internet browser | Chrome, Edge, Firefox, etc. |
| Enough storage | For database upload |
Important: Always create a backup before importing a new database. Importing may overwrite existing tables.
Step-by-Step Guide
Step 1: Log in to cPanel
What to do
Log in to your hosting account and open cPanel.
Why you’re doing it
cPanel is where you manage your website, databases, emails, and files.
What you’ll see
The cPanel dashboard with different management tools.
Beginner Tip
Use the search box and type phpMyAdmin if you cannot find it.
Common Mistake
Logging into the wrong hosting account.
Step 2: Open phpMyAdmin
What to do
Under the Databases section, click phpMyAdmin.
Why you’re doing it
phpMyAdmin lets you manage MySQL databases through a simple web interface.
What you’ll see
A list of all databases on the left side.
Beginner Tip
Make sure you know which database belongs to your website.
Common Mistake
Selecting the wrong database.
Step 3: Select Your Database
What to do
Click the database where you want to import your backup.
Why you’re doing it
The import process uploads your data into the selected database.
What you’ll see
The database tables (or an empty database if it’s new).
Beginner Tip
If the database is empty, that’s perfectly fine.
Common Mistake
Importing into another website’s database.
Step 4: Open the Import Tab
What to do
Click the Import tab from the top menu.
Why you’re doing it
This page allows you to upload your SQL backup file.
What you’ll see
A file upload form.
Beginner Tip
Leave most settings at their default values unless instructed otherwise.
Common Mistake
Changing import settings without knowing their purpose.
Step 5: Upload the Database File
What to do
Click Choose File and select your database backup.
Supported formats include:
- .sql
- .sql.gz
- .zip (depending on hosting support)
Why you’re doing it
This uploads the database backup into phpMyAdmin.
What you’ll see
The selected filename displayed.
Beginner Tip
Compressed (.sql.gz) files upload faster.
Common Mistake
Uploading website ZIP files instead of SQL files.
Step 6: Start the Import
What to do
Scroll down and click Import.
Why you’re doing it
phpMyAdmin now imports the database into MySQL.
What you’ll see
A progress screen.
Large databases may take several minutes.
Beginner Tip
Do not refresh the browser while importing.
Common Mistake
Closing the browser before the import finishes.
Step 7: Verify the Import
What to do
Wait until phpMyAdmin displays:
Import has been successfully finished.
Why you’re doing it
This confirms your database has been imported correctly.
What you’ll see
Database tables listed on the left.
Beginner Tip
Open a few tables to verify data exists.
Common Mistake
Ignoring error messages shown after import.
Supported Database File Types
| File Type | Description |
| .sql | Standard database backup |
| .sql.gz | Compressed SQL backup |
| .zip | Supported by some hosts |
| .csv | Used for importing table data only |
Best Practices
- Always create a fresh backup first.
- Import into the correct database.
- Double-check the database name.
- Keep SQL backups stored safely.
- Compress large SQL files.
- Avoid interrupting the import process.
- Test your website after importing.
- Delete old unused backups if no longer needed.
Common Problems and Solutions
| Problem | Solution |
| Upload limit exceeded | Increase PHP upload limit or use SSH/import tools |
| Import timeout | Split the SQL file or ask your host to import it |
| Wrong database selected | Import into the correct database |
| SQL syntax error | Verify the backup file isn’t corrupted |
| Database already contains tables | Empty or rename tables before importing |
| Browser freezes | Refresh only after confirming the import status |
| File won’t upload | Check file extension and size |
| Website still shows errors | Verify database credentials in the configuration file |
Frequently Asked Questions (FAQs)
1. Is importing a database safe?
Yes, if you use a trusted SQL backup and create a backup before importing.
2. Can I import a compressed SQL file?
Yes. Most hosting providers support .sql.gz files.
3. Will importing overwrite existing data?
If tables already exist with the same names, they may be replaced or cause errors depending on the SQL file.
4. What is phpMyAdmin?
phpMyAdmin is a browser-based tool for managing MySQL databases.
5. Can I import a very large database?
Yes, but large files may exceed hosting limits. Contact your hosting provider if needed.
6. Why does my import fail?
Common reasons include:
- Upload size limit
- Corrupted SQL file
- Timeout
- Wrong SQL format
7. Can I undo an import?
Not easily. That’s why creating a backup beforehand is recommended.
8. Does WordPress use phpMyAdmin?
Yes. WordPress stores its data inside a MySQL database that can be managed using phpMyAdmin.
Conclusion
Learning how to import database via phpMyAdmin in cPanel is an essential skill for every website owner. Whether you’re restoring a backup, moving to a new host, or setting up a website manually, the process is simple when you follow the correct steps.
Always verify that you’re importing into the correct database, keep regular backups, and test your website after the import is complete. Taking these precautions can save you time and help prevent data loss.
With a little practice, importing databases through phpMyAdmin becomes a quick and reliable part of managing your website.
